10-Rep Learning ~ Teague's Tech Treks

Learning Technology & Tech Observations by Dr. Helen Teague

By

An ADA Transcription Option: Google Voice Typing

Accessibility options for all learners require the need for transcriptions. Since I am often tasked with creating transcripts of my own and other professor’s video lectures I have looked at many, many options.

Since I can speak faster than I can type, Google Voice Typing has helped me with transcripting options and posting options. Steps: Open a New Google Document/Click the Tools Menu and choose “Voice Typing.” Click the red microphone icon on the left side and begin speaking. The Voice Typing editor will correct as you continue speaking and it is very accurate (much more than many other available options.)

I made a video to show my learners in a previous course how to use Google Voice Typing to create personalized eBooks. I snipped about 30-seconds of that video to show you. I will post and hope it will play for you when you click it. If you click on the video box it will go to Full Screen so you can see it better. I muted my voice to keep the file size small,  but just imaging I am speaking or you are speaking-

Do you think this might be a good option? ~Dr. T. 
By

Be Internet Awesome: Helping kids be safe, confident explorers of the online world.

Be Internet Awesome: Helping kids be safe, confident explorers of the online world.

This resource from Google is packed with curriculum, games that allow for hands-on practice, and even a pledge to teach students how to safely navigate the internet.

Here is the link: https://beinternetawesome.withgoogle.com/
#STEM

By

Uptime Google app available to all iOS users

Uptime, the app that enables users to share and watch YouTube videos in real-time with each other  is no longer invite-only. Recent updates to Uptime include the additional capability to play and share music videos.

The app is free to all iOS users.


Sources: Adweek, Variety

By

Back to School- Chrome Extensions

As the commercials extol, it is already back-to-school time. During the next few weeks, I’ll be profiling some necessary back-to-school (or work, or life) tools.

Today…Read & Write

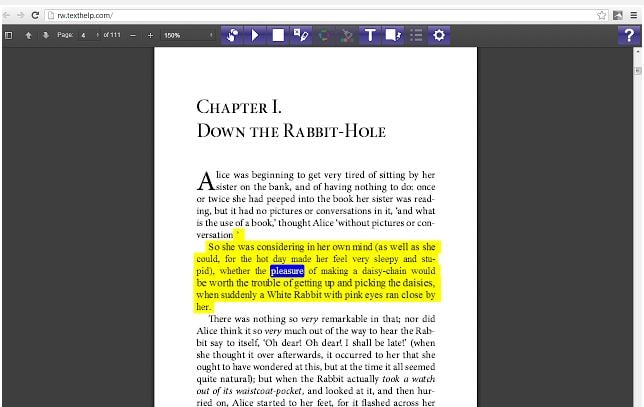
This is a fantastic extension that helps in the writing process, particularly by reading back text in a Google Doc. Read & Write uses the auditory learning style to catch writing mistakes. Anything that helps improve writing is a two thumbs up!

Features:
• Hear words, passages, or whole documents read aloud with easy-to-follow dual color highlighting

• See the meaning of words explained with text and picture dictionaries

• Hear text translated into other languages

• Predicts the next word as you type

• Highlight interesting or relevant text and collect it for use in other documents

Read&Write for Google™ is a friendly browser add-in for use with PCs, Macs and Chromebooks.

https://chrome.google.com/webstore/detail/readwrite-for-google/inoeonmfapjbbkmdafoankkfajkcphgd

Read&Write for Google Docs


By

Best Google Tip of the Week~How to Unsend a Gmail Email

By Brett Sparrgrove, via Lisa Monthie

Trust me, I know the feeling… you just sent an email and realized that you:

     a) Sent it to the wrong person
     b) Noticed that it had typos or incorrect information a split second after hitting send
     c) Shouldn’t have sent at all (bonus tip: don’t email when angry)
     d) All of the above
You can avoid much of this potential anguish if you turn on the undo send function in mail.  To turn on undo send, start by heading over to mail settings.
Once you are in the settings part of the mail world, head on over to Labs (the slightly experimental “holding bin” for some of mail’s best features).
You should spend some time later looking at the good stuff in Labs, but for now scroll down (or search) for and enable the Undo Send function.
Don’t forget to click the Save button (ironically, since Google is so good at auto-saving for us)
You’ll be taken back to your inbox but you are not quite finshed just yet.  Head back to the settings and scroll down a bit on the General page (which is the page to which you will be taken upon clicking on settings).  You should see the Undo Send: options.  Make sure that you have the Enable Undo Send option checked and select your cancellation period (5-30 seconds).  It is during this cancellation period that you can prevent your email from being sent.  It’s not a huge amount of time but it might be enough to spare your reputation.  Scroll to the bottom of the page and hit Save.

So, you are all set up… how does it all work?
Go ahead and compose and send your email just like you normally do.

Now, pay attention, because the clock on your undo is ticking.  You will notice after you send your email you will get a message that appears at the top of your inbox that confirms that your message has been sent (note: it actually has not been sent… It won’t really be sent until the cancellation period has elapsed).  Your keen eye may spot the Undo button next to that message.  Click that Undo button and your message will not be sent.

Once the cancellation period passes, the Undo button will disappear and your message will actually be sent (bye-bye).
So, the Undo Send function does have its limitations but it’s probably better than nothing.
Enjoy.

Brett Sparrgrove, via Lisa Monthie
Skip to toolbar